Introduction
Love a music video you saw on YouTube, but just want to take the audio with you? Free YouTube Downloader HD gives you the ability to take audio off of a video and easily convert video to MP3 or other audio formats that work on the media player of your choice.
Step 1. Choose Download Mode
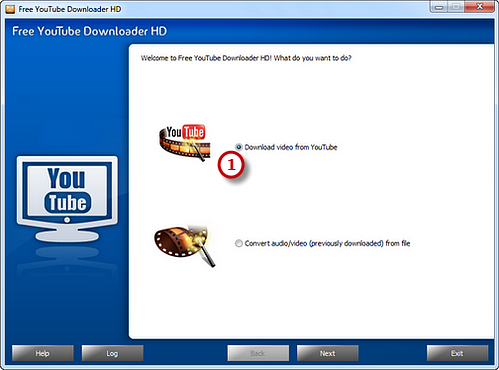
Launch Free YouTube Downloader HD. Choose “Download video from YouTube” mode (If you want to convert local video files, choose “Convert audio/video (previously downloaded) from file”).
Step 2. Paste YouTube Video URLs & Choose Download Settings
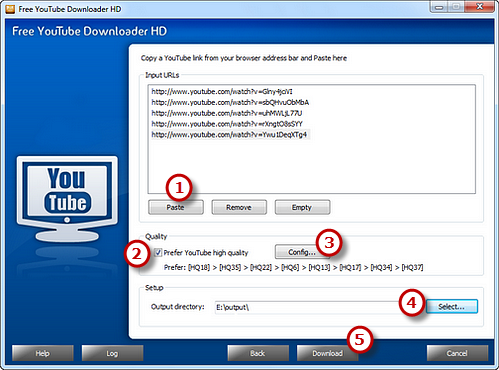
Copy the URLs of available YouTube videos and click “Paste” to paste them to the “Input URLs” section. You can click “Remove” button to delete the selected URL or click “Empty” button to clear all added URLs. The program will auto-check if the URLs are correct and pop up a window if wrong URLs are pasted. Check the “Prefer YouTube high quality” and click “Config…” button to activate the window in which you can choose the preferred quality from the list. Click “Select…” to choose download folder. Then, click “Download” to start download.
Step 3. Start Download
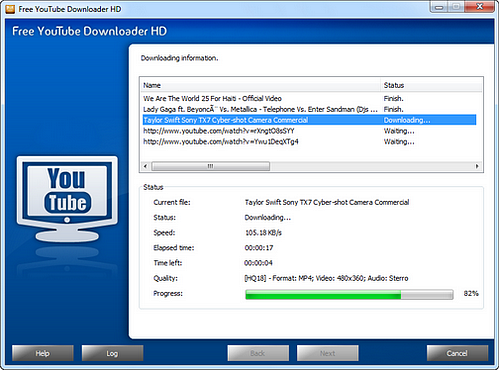
After you hit “Download” and the program will detect the URLs you paste to find the real download link. Within few seconds, the name of the video will be displayed and the download is started. You can view the file info, downloading speed, time estimation and a progress bar.
Step 4. Input Video Files
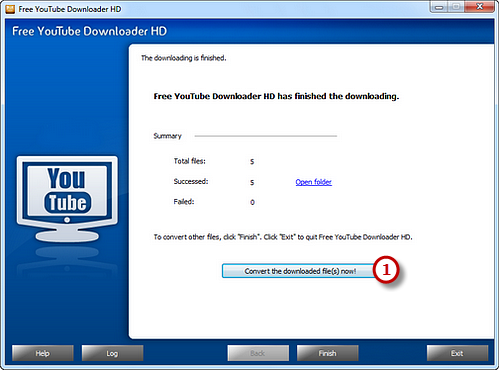
When the download is finished, you can see a brief task report and an “Open folder” button to directly open the download folder. Click the “Convert the downloaded file(s) now!” for continuing conversion and the downloaded YouTube videos will be added to the conversion list.
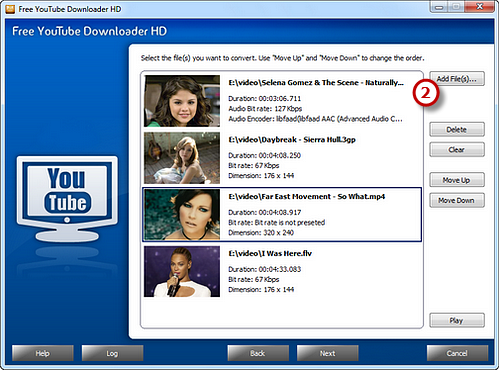
You are allowed to add more videos to the list by “Add File(s)...” button. You can remove any or all of the imported videos with the “Delete” & “Clear” button and arrange the order of files by “Move Up” or “Move Down” button or by dragging the listed videos.
Step 5. Preset Output Settings
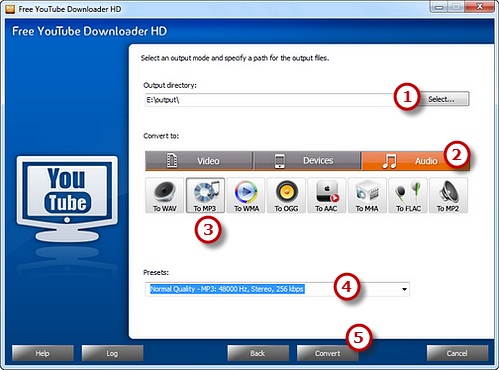
Click “Select…” to choose an output folder to save the output files. Click “Audio” tab to choose “To MP3” as an output format (there are 3 tabs for output formats: “Video”, “Devices” & “Audio” and each tab contains various output formats). Then, adjust the format presets in the “Presets” dropdown list if more precise output quality is required. Click “Convert” to start conversion.
Step 6. Start Conversion
After you hit “Convert”, some conversion information and a progress bar will be displayed within just few seconds. You can choose to play a sound or shut down the computer when conversion is finished.

When the conversion is finished, you can have a view of the general report about the conversion. Click “Open folder” to directly find the output file.

